 English
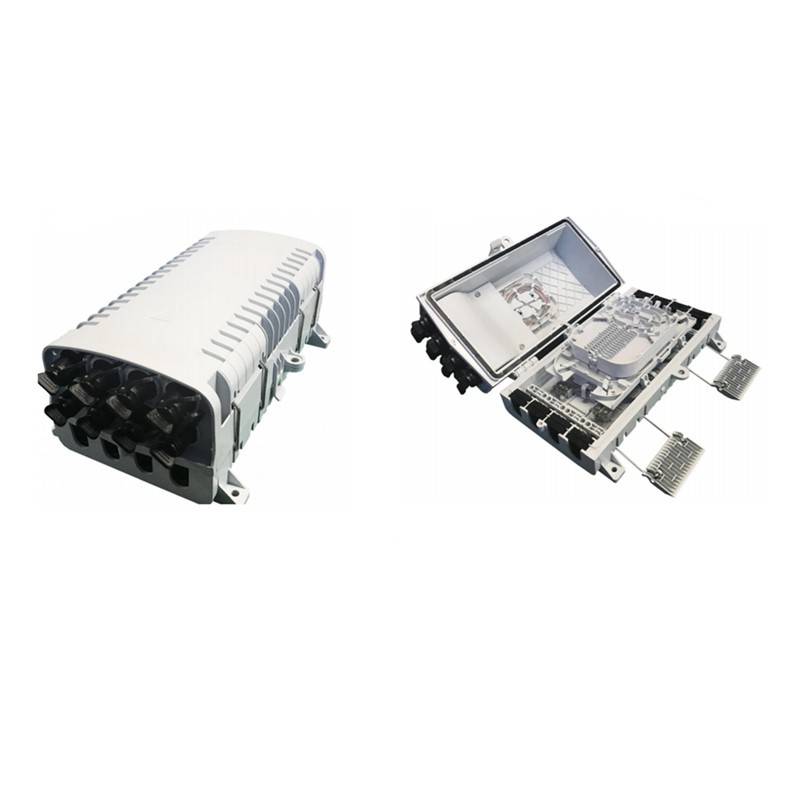
Description
1. General
1.1 Description
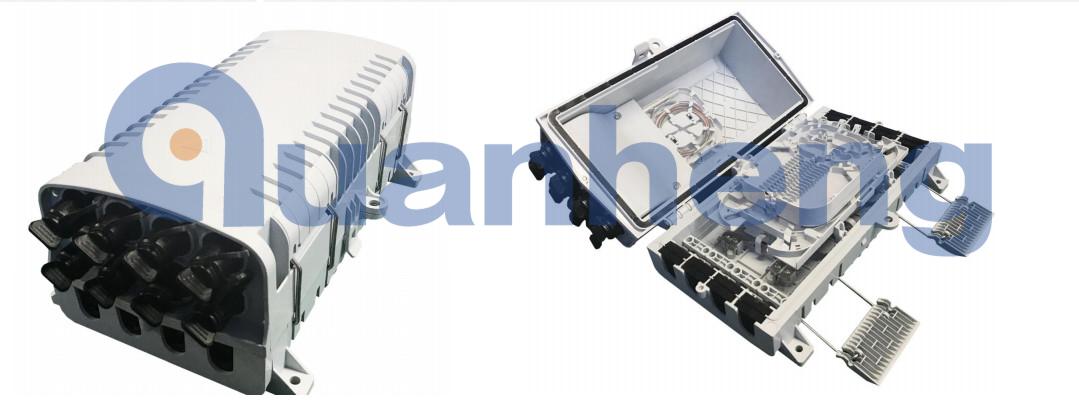
FAT-8C09 Pre-connectorized optical distribution box as the most advanced FTTX network distribution node equipment,provide quick and reliable connection, good protection and management for the FTTX network.
1.2 Standards Comply
The product is designed, manufactured and tested according to the standards as follows:
|
IEC 62134-1-2002 |
Fiber optic enclosures - Part 1: Generic specification |
|
IEC61300-2 |
Fiber optic interconnecting devices and passive components - Basic test and measurement procedures |
|
IEC60068-2 |
Basic environmental testing procedures for electric and electronic products |
1.3 Applications Environment
|
Item |
Value |
|
Operation temperature |
-40 ºC~+65 ºC |
|
Installation temperature |
-15 ºC~+40 ºC |
|
Storage temperature |
-45 ºC~+75 ºC |
|
Relative humidity |
≤85% (+30℃) |
|
Atmospheric pressure |
70KPa~106Kpa |
2.Characteristics
1.Advanced structure design,easy operation and reasonable routing.
2.Material:PP or PC+ABS.
3.Moistureproof,waterproof,dust-proof,anti-aging.
4.Protection level up to IP65.
5.8in/out cable holes,8 preconnected adapters.
6.Installation method:pole-mounted,aerial-mounted,wall-mounted.
7.It can be equipped with drop cable storage tray to meet the storage of 50meters 5mm round cable.
3.Specifications3.1Mechanical specifications
|
Item |
Specifications |
Remark |
|
Material of housing |
PC+ABS |
|
|
Material of internal components |
PC+ABS/ABS |
|
|
Material of metal accessory |
High-quality stainless steel |
|
|
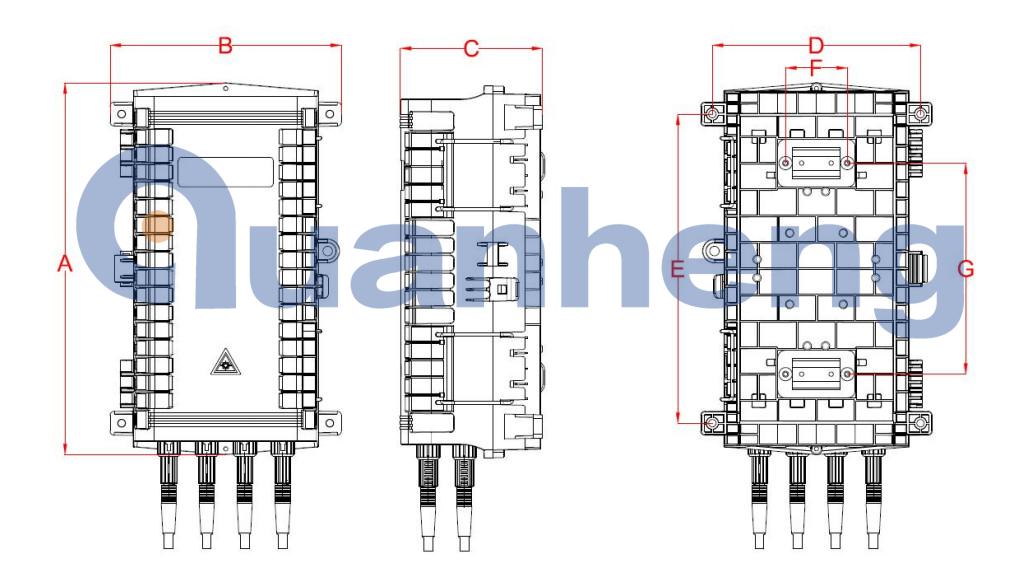
External dimension(mm) |
313*195*120 mm |
A*B*C |
|
Installation hole position(mm) |
175.5*260.2*52*177.6 mm |
D*E*F*G |
|
Color |
Black/ Gray |
According to customer requirements |
|
Number of cable port |
8 |
|
|
Fiber cable dimension of cable port (mm) |
Φ5-Φ17 |
|
|
Number of Pre-connectorized adaptors |
8 |
8 Black(Default) |
|
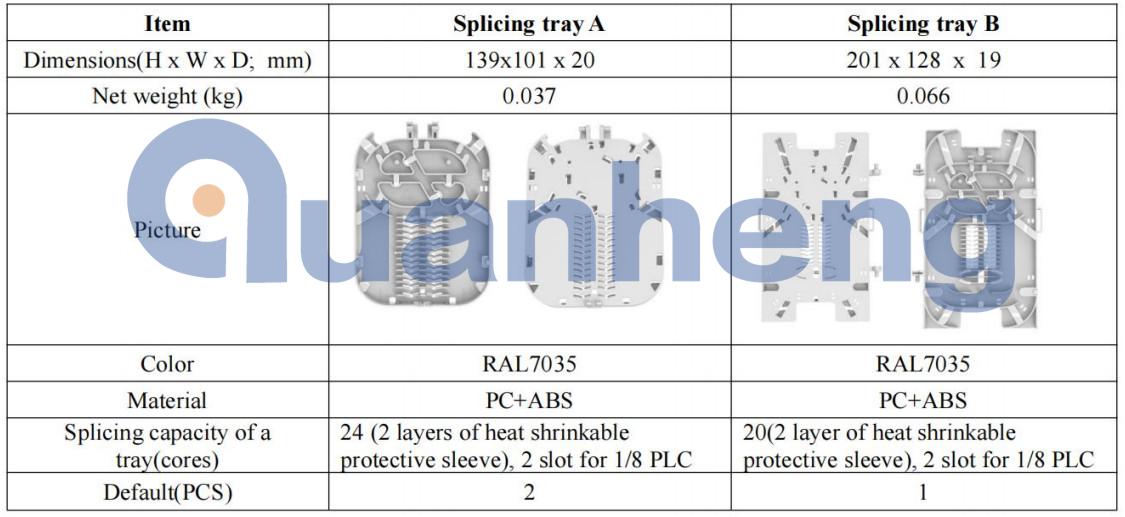
Fusion capacity(Max) |
68 |
Tray A ,24x2=48, 2 layers of heat-shrinkable splice protection sleeve. |
|
Tray B ,20x1=20, 2 layers of heat-shrinkable splice protection sleeve. |
||
|
Micro PLC Splitter |
1x2 |
Splitter size:60x7x4mm. |
|
1x4 |
||
|
1x8 |
||
|
IP grade |
IP65 |
|
|
Flammability |
UL-94HB |
It can be customized according to needs. |
|
Neutral salt spray test (NSS) |
48h |
3.2 Optical specifications
|
Model |
Splitter or pigtail |
IL(dB) |
RL(dB) |
IL(dB) |
Test method |
|
FAT-8C09 |
Pigtail-SC/APC-00-SM-SX(1C1F)-OD0.9MM-PVC-G657A2-Cable Color(Defaults)-Indoor-RoHS-1.5m |
≤0.3 |
≥55dB |
≤0.5 |
IL: IEC61300-3-4 |
|
1x2 PLC Splitter, with SC/APC connector |
≤4.0 |
≥55dB |
≤4.2 |
||
|
1x4 PLC Splitter, with SC/APC connector |
≤7.4 |
≥55dB |
≤7.6 |
||
|
1x 8 PLC Splitter, with SC/APC connector |
≤10.5 |
≥55dB |
≤10.7 |
The optical parameters shown in the table above are default values,and can be customized according to requirements.
3. 3 Port color
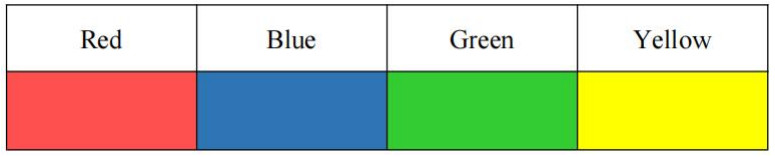
The color of the product may vary and is for reference only
4. Routing diagram
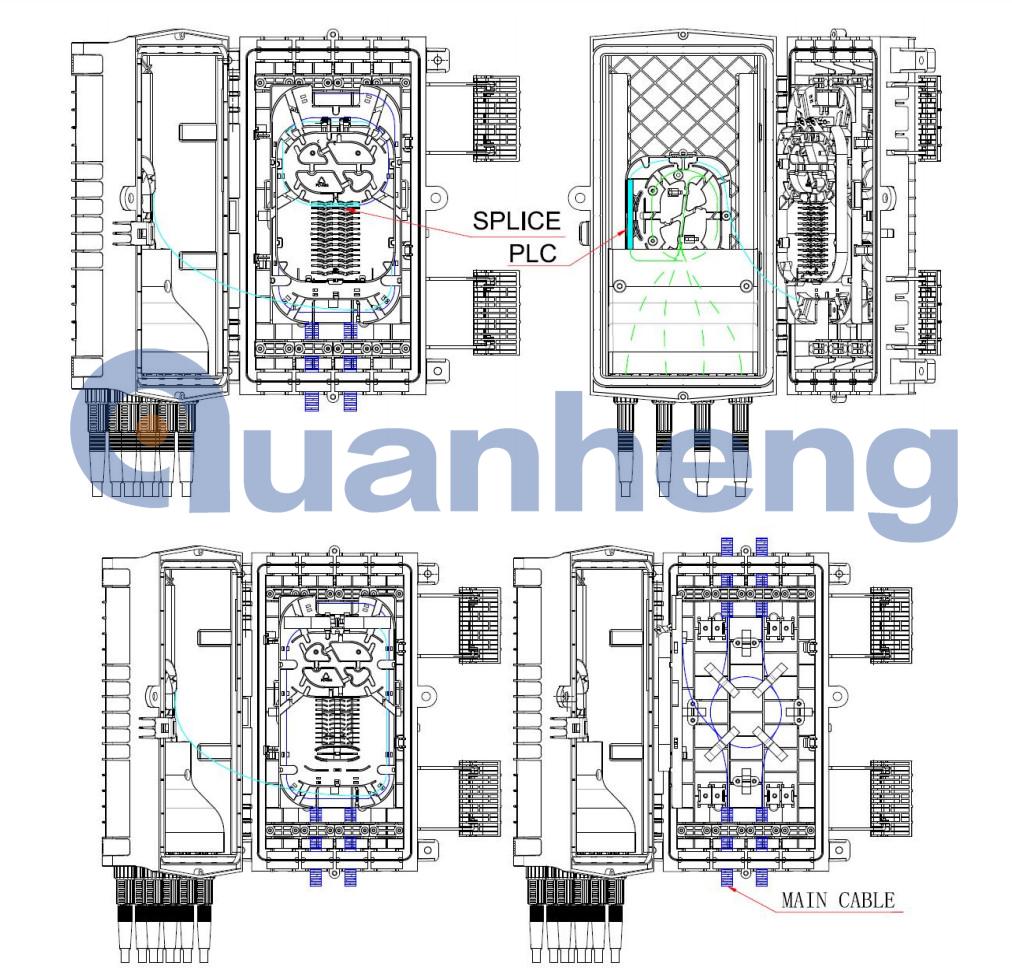
5. Splicing tray
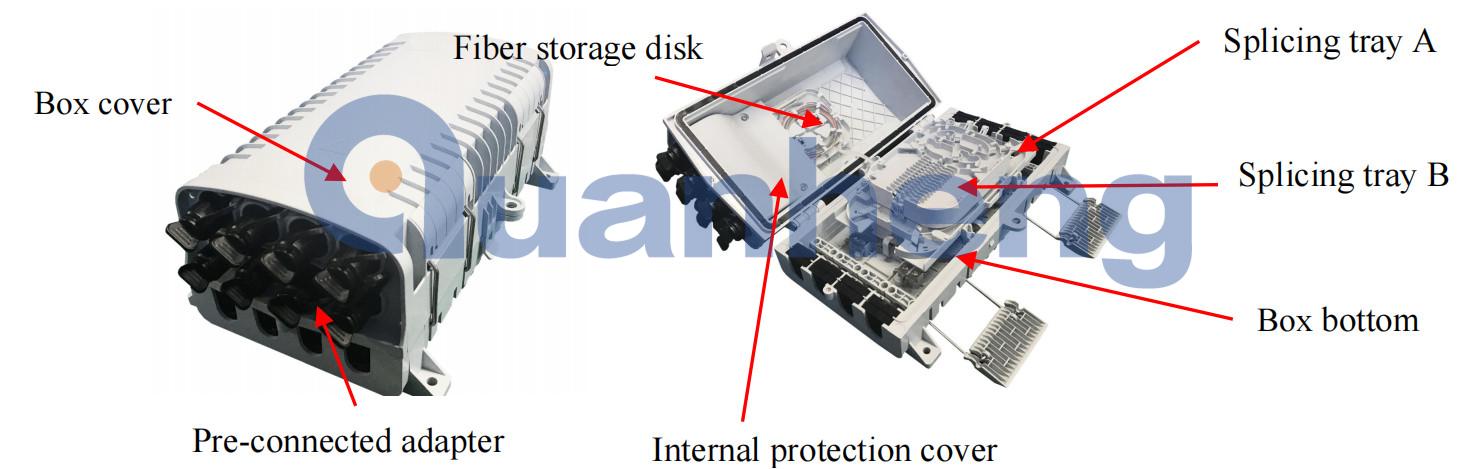
6. Configuration
6.1 Main parts
|
No. |
Part name |
Unit |
Quantity |
Remark |
|
1 |
Box bottom |
pcs |
1 |
|
|
2 |
Box cover |
pcs |
1 |
|
|
3 |
Splicing tray A |
pcs |
2 |
|
|
4 |
Splicing tray B |
pcs |
1 |
|
|
5 |
Internal protection cover |
pcs |
1 |
|
|
6 |
Pre-connected adapter |
pcs |
8 |
Black |
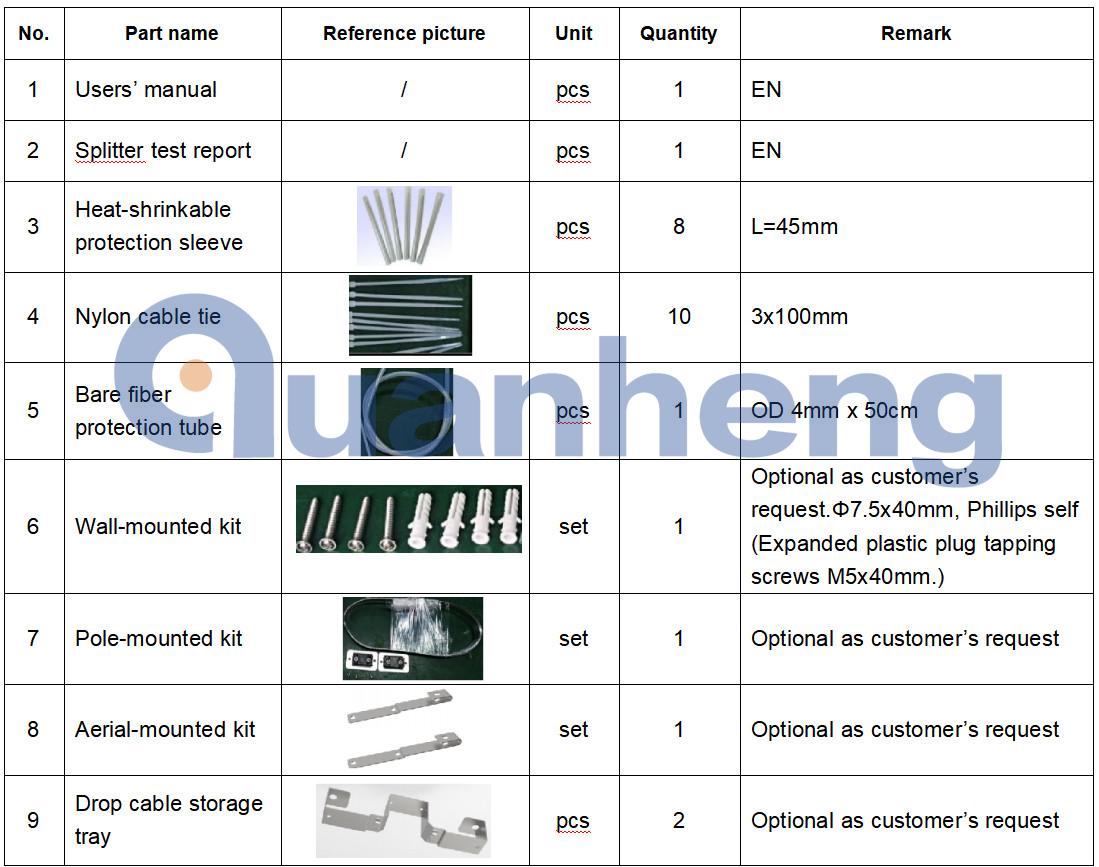
6.2 Accessories
7. Installation
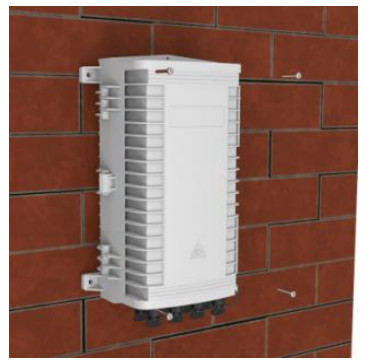
7.1. Wall-mounted installation
Drill 4 holes on the wall according to the size of the bottom wall hanging, place the expansion plug Φ 7.5 * 40, place the box to match the hole, and fasten with screws.
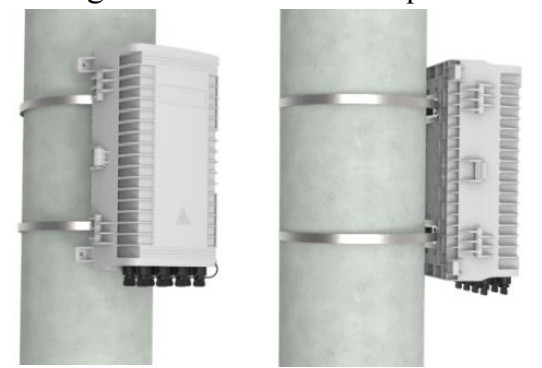
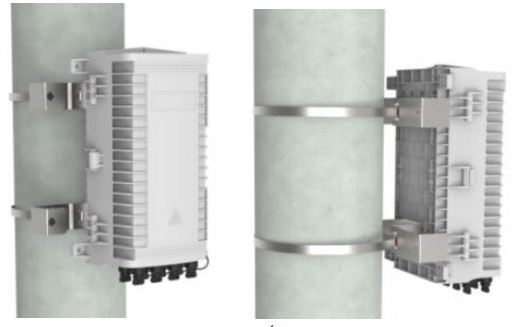
7.2. Pole-mounted installation
Pass the stainless steel belt through the slot of the back plate and fix it on the pole
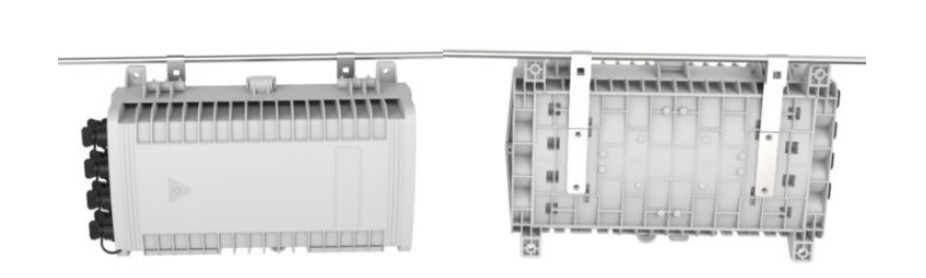
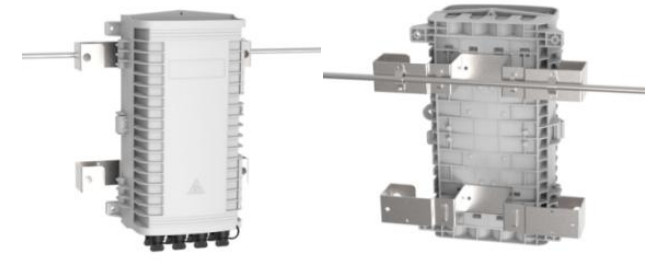
7.3. Aerial-mounted installation
Hang the hook on the messenger, and tighten the bolts and nuts of the hook.
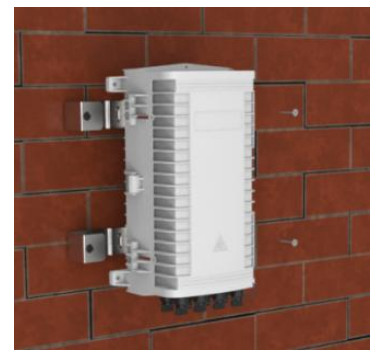
7.4. Wall-mounted installation (With drop cable storage tray)
Install the drop cable storage tray on the back of the box;Drill 4 holes in the wall according to the dimension of the drop cable storage tray mounting hole, place the expansion plug Φ 7.5 * 40, place the box to match up the holes, and fasten with the screws.
7.5. Pole-mounted installation (With drop cable storage tray)
Install the drop cable storage tray on the back of the box; Pass the stainless steel belt through the slot of the drop cable storage tray and fix it on the pole with buckle.
7.6. Aerial-mounted installation (With drop cable storage tray)
Install the drop cable storage tray on the back of the box;Use the small metal plate to fix the distribution box to the messenger.
8. Connector operation
8.1 Pre-connected adapter - A( E)

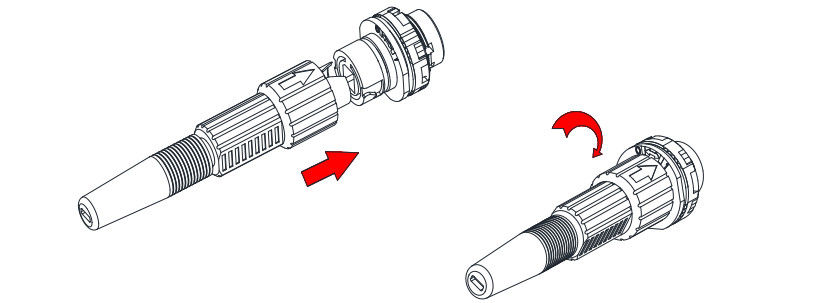
The arrow part of fiber connector is above, insert fiber connector into the socket and then rotate the arrow part clockwise.
8.2 Pre-connected adapter - B(XL )
Insert the SC optical fiber connector plug through the loose parts in turn, and then plug it into the adapter;
Install XL pre connected adapter sheath on adapter with plastic key;
Insert the plug of the snap spring into the sheath;
The cable clamp shall be installed and the line shall be close to the plug;
Screw the leather cable clamp seat cap on the sheath clockwise.

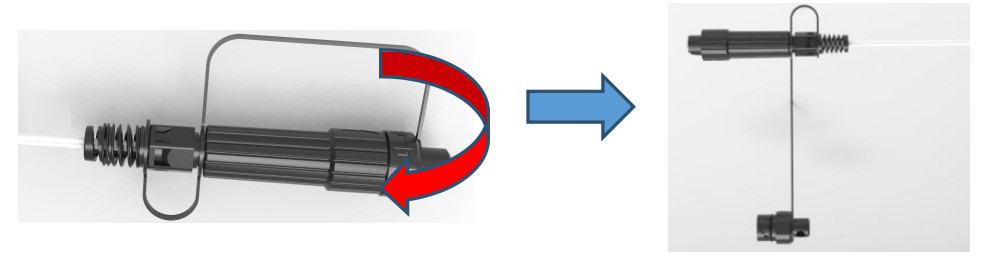
8.3 Pre-connected adapter - C
Push the sliding ring on the optical fiber preformed plug in the direction of the arrow to remove the dust cap;
press the button to take out the dust cap on the adapter in the direction of the arrow.
Align the body of the preformed plug with the adapter buckle until it is fastened. Connect the two dust covers in the same way.
The installed prefabricated plug pushes the sliding ring to release the buckle, and then pull the main body backward to separate it.
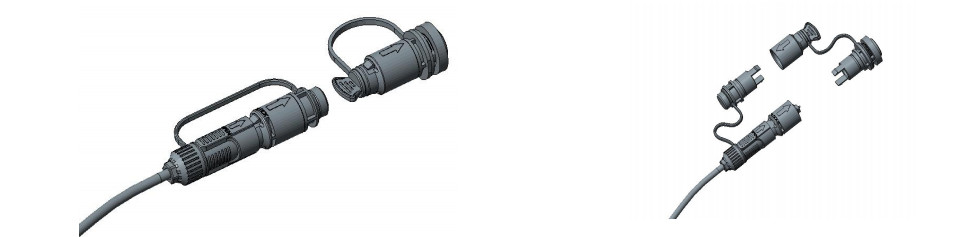
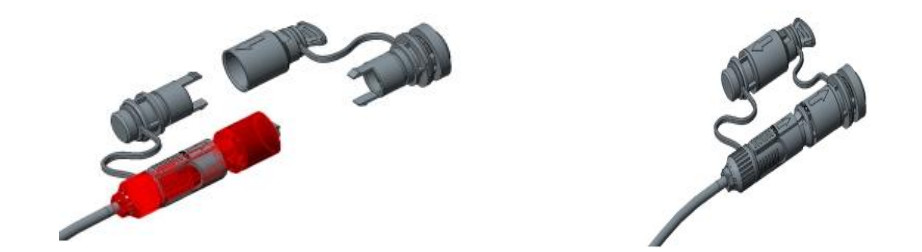
8.4 Pre-connected adapter - D
Turn the pre connected plug anti clockwise and open the pre connected plug and dust cover in the direction of the arrow.

Connect the pre connected plug D and the pre connected adapter D in the direction of the arrow, and rotate the plug clockwise to fix it.

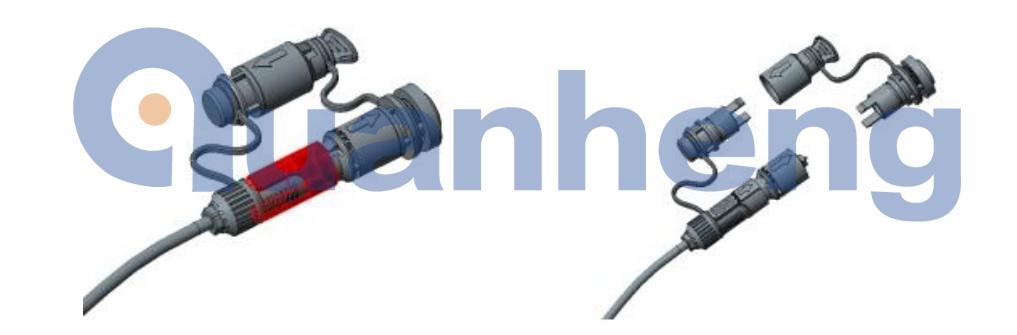
8.5 Pre-connected adapter - E ( A )
Turn the pre connected plug anti clockwise and open the pre connected plug and dust cover in the direction of the arrow.
Connect the pre connected plug E and the pre connected adapter E in the direction of the arrow, and rotate the plug clockwise to fix it.
![]()
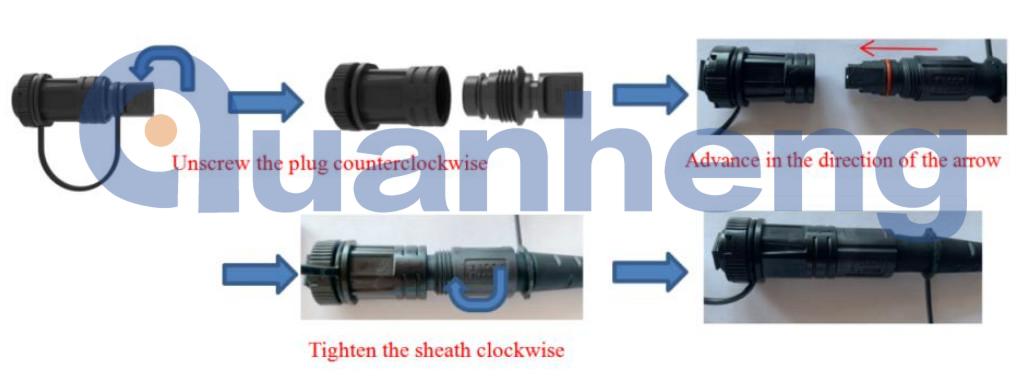
8.6 Pre-connected adapter - F

Insert the SC optical fiber connector plug through the loose parts in turn, and then plug it into the adapter;
Install XL pre connected adapter sheath on adapter with plastic key;
Insert the plug of the snap spring into the sheath;
The cable clamp shall be installed and the line shall be close to the plug;
Screw the leather cable clamp seat cap on the sheath clockwise.
8.7 Pre-connected adapter - G
9. Package
|
Item |
Material |
Size(mm) |
Quantity |
Gross weight(kg) |
|
Independent product packaging |
Carton |
395*210*150 |
1 |
1.5 |
|
Outer packaging carton |
Carton |
440*410*640 |
10 |
16 |
|
Note: Without drop cable storage tray |
||||
10. Environmental characteristics
This product complies with the RoHS environmental protection directive, and the content of lead, cadmium, mercury, hexavalent chromium, polybrominated biphenyl (PBB) and polybrominated diphenyl ether (PBDE) does not exceed the limit.


